Showing posts with label Learning jQuery 3rd Edition. Show all posts

Thursday, April 26, 2012

Solution to Chapter 8 Exercises of Learning jQuery 3rd Edition


My solutions to Learning jQuery 3rd Edition Chapter 7 exercises:


Exercises:


Some of the exercises are requires modifications of codes from the book. You can easily locate my modifications by looking for //--------------Added sections


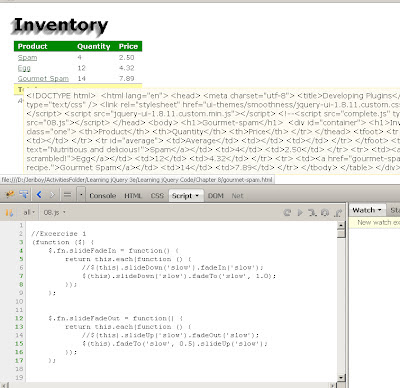
1. Create new plugin methods called .slideFadeIn() and .slideFadeOut(), combining the opacity animations of .fadeIn() and .fadeOut() with the height animations of .slideDown() and .slideUp().

(function ($) {
    $.fn.slideFadeIn = function() {
        return this.each(function () {
            //$(this).slideDown('slow').fadeIn('slow');
            $(this).slideDown('slow').fadeTo('slow', 1.0);
        });
    };
  
    $.fn.slideFadeOut = function() {
        return this.each(function () {
            //$(this).slideUp('slow').fadeOut('slow');
            $(this).fadeTo('slow', 0.5).slideUp('slow');
        });
    };
})(jQuery);

//------Sample code for testing excercise 1
jQuery(document).ready(function ($) {

    //Test for .slideFadeIn & .slideFadeOut
    //Click the <h1>Inventory</h1> to see the effect of these new methods
    $('#container h1').toggle(function() {
        $('#inventory').slideFadeOut();
    }, function () {
        $('#inventory').slideFadeIn();
    });
});


2. Extend the customizability of the .shadow() method so that the z-index of the cloned copies can be specified by the plugin user. Add a new sub-method called isOpen to the tooltip widget. This sub-method should return true if the tooltip is currently displayed and false otherwise.


/******************************************************************************
.shadow()
Create a shadow effect on any element by brute-force copying.
******************************************************************************/
(function ($) {
    $.fn.shadow = function (opts) {
        var options = $.extend({}, $.fn.shadow.defaults, opts);

        return this.each(function () {
            var $originalElement = $(this);
            for (var i = 0; i < options.copies; i++) {
                var offset = options.copyOffset(i);
                $originalElement
          .clone()
          .css({
              position: 'absolute',
              left: $originalElement.offset().left + offset.x,
              top: $originalElement.offset().top + offset.y,
              margin: 0,
              //------------------------------------------------------Added
              zIndex: options.zIndex,
              //-------------------------------------------------------------
              opacity: options.opacity
          })
          .appendTo('body');
            }
        });
    };

    $.fn.shadow.defaults = {
        copies: 5,
        opacity: 0.1,
        copyOffset: function (index) {
            return { x: index, y: index };
        },
        //------------------------------------------------------Added
        zIndex: -1
        //-----------------------------------------------------------
    };
})(jQuery);


/******************************************************************************
.tooltip()
A simple jQuery UI tooltip widget.
******************************************************************************/
(function ($) {
    $.widget('ljq.tooltip', {
        options: {
            offsetX: 10,
            offsetY: 10,
            content: function () {
                return $(this).data('tooltip-text');
            }
        },

        _create: function () {
            //------------------------------------------------------Added
            this.isTooltipOpen = false;
            //-----------------------------------------------------------

            this._tooltipDiv = $('<div></div>')
                .addClass('ljq-tooltip-text ui-widget ui-state-highlight ui-corner-all')
                .hide().appendTo('body');
                    this.element
                .addClass('ljq-tooltip-trigger')
                .bind('mouseenter.ljq-tooltip', $.proxy(this._open, this))
                .bind('mouseleave.ljq-tooltip', $.proxy(this._close, this));
        },

        destroy: function () {
            this._tooltipDiv.remove();
            this.element.removeClass('ljq-tooltip-trigger')
                        .unbind('.ljq-tooltip');
            $.Widget.prototype.destroy.apply(this, arguments);
        },

        open: function () {
            this._open();
        },

        close: function () {
            this._close();
        },

        _open: function () {

            //------------------------------------------------------Added
            this.isTooltipOpen = true;
            //-----------------------------------------------------------
            if (!this.options.disabled) {
                var elementOffset = this.element.offset();
                this._tooltipDiv.css({
                    left: elementOffset.left + this.options.offsetX,
                    top: elementOffset.top + this.element.height() + this.options.offsetY
                }).text(this.options.content.call(this.element[0]));
                this._tooltipDiv.show();
                this._trigger('open');
            }
        },

        _close: function () {
           
            //------------------------------------------------------Added
            this.isTooltipOpen = false;
            //-----------------------------------------------------------

            this._tooltipDiv.hide();
            this._trigger('close');
        },

        //------------------------------------------------------Added
        isOpen: function() {
            return this.isTooltipOpen;
        }
        //-----------------------------------------------------------
    });
})(jQuery);


//------Sample code for testing excercise 2
jQuery(document).ready(function ($) {

    $.fn.shadow.defaults.copies = 10;
    //$.fn.shadow.defaults.zIndex = 2; //if you uncomment this, Clicking <h1>Inventory</h1> will have no effect
    $('h1').shadow({
        copyOffset: function (index) {
            return { x: -index, y: index };
        }
    });   

    //$('a').tooltip();
    $('a').tooltip().hover(function () {
        //alert($(this).tooltip('isOpen').toString());       
        console.log('Is tooltip open? -> ' + $(this).tooltip('isOpen').toString());
    });
});


3. Add code that listens for the tooltipopen event that our widget fires, and logs a message to the console.


jQuery(document).ready(function ($) {
    $('a').bind('tooltipopen', function () {
        console.log('tooltip open event fires');
    });
});


4. Challenge: Provide an alternative content option for the tooltip widget that fetches the content of the page and anchor's href points to via Ajax, and displays that content as the tooltip text.


jQuery(document).ready(function ($) {
    $('a').tooltip({ content: function () {
        var url = $(this).attr('href');
        var result = null;
        $.ajax({
            url: url,
            type: 'get',
            dataType: 'html',
            async: false,
            success: function (data) {
                result = data;
            }
        });

        return result;
    }});
});


5. Challenge: Provide a new effect option for the tooltip widget that, if specified, applies the named jQuery UI effect (such as explode) to the showing and hiding of the tooltip.


/******************************************************************************
.tooltip()
A simple jQuery UI tooltip widget.
******************************************************************************/
(function ($) {
    $.widget('ljq.tooltip', {
        options: {
            offsetX: 10,
            offsetY: 10,
            content: function () {
                return $(this).data('tooltip-text');
            }
        },

        _create: function () {
            //------------------------------------------------------Added
            this.isTooltipOpen = false;
            //-----------------------------------------------------------

            this._tooltipDiv = $('<div></div>')
                .addClass('ljq-tooltip-text ui-widget ui-state-highlight ui-corner-all')
                .hide().appendTo('body');
            this.element
                .addClass('ljq-tooltip-trigger')
                .bind('mouseenter.ljq-tooltip', $.proxy(this._open, this))
                .bind('mouseleave.ljq-tooltip', $.proxy(this._close, this));
        },

        destroy: function () {
            this._tooltipDiv.remove();
            this.element.removeClass('ljq-tooltip-trigger')
                        .unbind('.ljq-tooltip');
            $.Widget.prototype.destroy.apply(this, arguments);
        },

        open: function () {
            this._open();
        },

        close: function () {
            this._close();
        },

        _open: function () {

            //------------------------------------------------------Added
            this.isTooltipOpen = true;
            //-----------------------------------------------------------

            if (!this.options.disabled) {
                var elementOffset = this.element.offset();
                this._tooltipDiv.css({
                    left: elementOffset.left + this.options.offsetX,
                    top: elementOffset.top + this.element.height() + this.options.offsetY
                }).text(this.options.content.call(this.element[0]));
                this._tooltipDiv.show();
                this._trigger('open');

                //------------------------------------------------------Added
                if(this.options.effect) {
                    this._tooltipDiv.effect(this.options.effect, {distance: 10, duration: 80});
                }
                //-----------------------------------------------------------
            }
        },

        _close: function () {

            //------------------------------------------------------Added
            this.isTooltipOpen = false;
            //-----------------------------------------------------------

            this._tooltipDiv.hide();
            this._trigger('close');
        },

        //------------------------------------------------------Added
        isOpen: function () {
            return this.isTooltipOpen;
        }
        //-----------------------------------------------------------
    });
})(jQuery);

//------Sample code for testing excercise 5
jQuery(document).ready(function ($) {
    $('a').tooltip({effect: 'shake'});
});


Free Lessons for Chruch Pianists:
Free lessons, tips and downloads for church pianists

DVD Courses (Reharmonization, Play by Ear!, Arranging, Accompanying, Theory for Church Pianists, etc.):
Over 30 hours of DVD instruction for church pianists


Visit Vitabase for Quality Health Supplements

Sunday, April 22, 2012

Solution to Chapter 7 Exercises of Learning jQuery 3rd Edition

My solutions to Learning jQuery 3rd Edition Chapter 7 exercises: 


1. Increase the cycle transition duration to half a second, and change the animation such that each slide fades out before the next one fades in. Refer to the Cycle documentation to find the appropriate option to enable this.

jQuery(document).ready(function ($) {
    $('#books').cycle({
        timeout: 500,
        speed: 200,
        pause: true,
        //------------------
        fx: 'fade',
        //------------------
        before: function () {
            $('#slider').slider('value', $('#books li').index(this));
        }
    });

});


2. Set the cyclePaused cookie to persist for 30 days.


jQuery(document).ready(function ($) {
    $('<button>Pause</button>').click(function () {
        $('#books').cycle('pause');
        //-----------------------------------------------
        $.cookie('cyclePaused', 'y', { expires: 30 });
        //-----------------------------------------------
        return false;
    }).button({
        icons: { primary: 'ui-icon-pause' }
    }).appendTo('#books-controls');

});


3. Constrain the title box to resize only in ten pixel increments.

jQuery(document).ready(function ($) {
    $('#books .title').resizable({
        handles: 's',
        //--------------------
        distance: 10
        //--------------------
    });

});


4. Make the slider animate smoothly from one position to the next as the slideshow advances.

jQuery(document).ready(function ($) {
    $('<div id="slider"></div>').slider({
        min: 0,
        max: $('#books li').length - 1,
        slide: function (event, ui) {
            $('#books').cycle(ui.value);
        },
        //-------------------
        animate: true
        //-------------------
    }).appendTo('#books-controls');

});


5. Instead of letting the slideshow loop forever, cause it to stop after the last slide is shown. Disable the buttons and slider when this happens.


jQuery(document).ready(function ($) {
    $('#books').cycle({
        timeout: 500,
        speed: 200,
        pause: true,
        fx: 'fade',
        //---------------
        nowrap: true,
        //---------------
        before: function () {
            $('#slider').slider('value', $('#books li').index(this));
        }
    });

});


6. Create a new jQuery UI theme that has a light blue widget background and dark blue text, and apply the theme to our sample document. 


a. Go to http://jqueryui.com/themeroller/
b. Click on the "Content" tab as shown in the image below:


c. Click on the "Clickable: default state" tab and do the same thing you did in step b.
d. Click "Download theme" button
(Download the zip file and integrate the css and js files contained in the zip file into your site)


Free Lessons for Chruch Pianists:
Free lessons, tips and downloads for church pianists

DVD Courses (Reharmonization, Play by Ear!, Arranging, Accompanying, Theory for Church Pianists, etc.):
Over 30 hours of DVD instruction for church pianists


Visit Vitabase for Quality Health Supplements


Friday, April 20, 2012

Solution to Chapter 6 Exercises of Learning jQuery 3rd Edition


My solutions to Learning jQuery 3rd Edition Chapter 6 exercises:


1. When the page loads, pull the body content of exercises-content.html into the content area of the page.

jQuery(document).ready(function ($) {
    $('#dictionary').load('exercises-content.html');
});


2. Rather than displaying that whole document at once, create "tooltips" for the letters in the left column by loading just the appropriate letter's content from exercises-content.html when the user's mouse is over the letter.

jQuery(document).ready(function ($) {
    $('div[id^="letter-"] a').hover(function () {
        var id = $(this).closest('div').attr('id');
        //alert(id);
        $('#dictionary').load('exercises-content.html #' + id);
    }, function () {
        $('#dictionary').html('');
    });

});


3. Add error handling for this page load, displaying the error message in the content area. Test this error handling code by changing the script to request does-not-exist.html rather than exercises-content.html.

jQuery(document).ready(function ($) {
    $.get('does-not-exist.html', function (data) {
        $('#dictionary').append(data);
    }).error(function (jqxhr) {
        $('#dictionary').html('<h2>an error occured: ' + jqxhr.status + '</h2>').append(jqxhr.responsetext);
    });

});


4. Challenge: When the page loads, send a JSONP request to Twitter and retrieve a user's last five messages. Insert the messages into the content area of the page. The URL to retrieve the last five messages of user kswedberg is: http://twitter.com/statuses/user_timeline/kswedberg.json?count=5.

jQuery(document).ready(function ($) {
    // with help from http://wpcanyon.com/tipsandtricks/2-different-ways-for-getting-twitter-status-php-and-jquery/
    var url = 'http://twitter.com/statuses/user_timeline/jeremiahflaga.json';
   
    $.getJSON(url + '?count=5&callback=?', function (data) {
        var html = '';
        $.each(data, function (entryIndex, entry) {
            html += '<h3 class="entry">' + entry.text + '</h3>';
        });
        $('#dictionary').html(html);
    });

});


Free Lessons for Chruch Pianists:
Free lessons, tips and downloads for church pianists

DVD Courses (Reharmonization, Play by Ear!, Arranging, Accompanying, Theory for Church Pianists, etc.):
Over 30 hours of DVD instruction for church pianists


Visit Vitabase for Quality Health Supplements


Sunday, April 15, 2012

Solution to Chapter 5 Exercises of Learning jQuery 3rd Edition


Free Lessons for Chruch Pianists:
Free lessons, tips and downloads for church pianists

DVD Courses (Reharmonization, Play by Ear!, Arranging, Accompanying, Theory for Church Pianists, etc.):
Over 30 hours of DVD instruction for church pianists


My solutions to Learning jQuery 3rd Edition Chapter 5 Exercises:

1. Alter the code that introduces the back to top links so that the links only appear beginning after the fourth paragraph.

jQuery(document).ready(function ($) { 
    $('<a href="#top">back to top</a>').insertAfter('div.chapter p:gt(2)');
});


2. When a back to top link is clicked, add a new paragraph after the link, containing the message You were here. Ensure that the link still works.

jQuery(document).ready(function ($) { 
    $('a').click(function () {
        $('p:contains("You were here.")').remove();
        $(this).after('<p style=\"color: blue\">You were here.</p>');
    });
});


3. When the author's name is clicked, turn it bold (by adding a tag, rather than manipulating classes or CSS attributes).

jQuery(document).ready(function ($) { 
        $('#f-author').click(function () {
            $(this).wrapAll('<b></b>');
        });
});


4. Challenge: On a subsequent click of the bolded author's name, remove the <b> element that was added (thereby toggling between bold and normal text).

jQuery(document).ready(function ($) { 
    $('#f-author').toggle(
        function () {
            $(this).wrapAll('<b></b>');
        },
        function () {
            $(this).unwrap()
        }
    );
});


5. Challenge: Add a class of inhabitants to each of the chapter's paragraphs, without calling .addClass(). Make sure to preserve any existing classes.

jQuery(document).ready(function ($) { 
    var $chapter_p = $('.chapter p');
    var chapter_p_class = $chapter_p.attr('class')
    $chapter_p.attr({ class: chapter_p_class + ' inhabitants' });
});


Friday, March 30, 2012

Solution to Chapter 4 Exercises of Learning jQuery 3rd Edition


My solutions to Learning jQuery 3rd Edition Chapter 4 Exercises:

1. Alter the stylesheet to hide the contents of the page initially. When the page is loaded, fade in the contents slowly.

jQuery(document).ready(function ($) {
    $('body').hide().fadeIn(4000);
});


2. Give each paragraph a yellow background only when the mouse is over it.

jQuery(document).ready(function ($) {
    var currentBgColor = $('p').css('background-color');
    $('p').hover(function () {
        $(this).css('background-color', 'yellow');
    }, function () {
        $(this).css('background-color', currentBgColor);
    });
});


3. Make a click of the title (<h2>) simultaneously make it fade to 25% opacity and get a left margin of 20px, then when this is complete, fade the speech text to 50% opacity.

jQuery(document).ready(function ($) {
    $('h2').click(function () {
        $(this).fadeTo('slow', .25).animate({
            marginLeft: '20px'
        }, {
            duration: 'slow',
            queue: false
        }, function () {            // completion callback
            $('.speech').fadeTo('slow', .5)
        });
    });

    //OR
    //    $('h2').click(function () {
    //        $(this).animate({
    //            opacity: 0.25,
    //            marginLeft: '20px'
    //        }, 'slow', function () {
    //            $('.speech').fadeTo('slow', .5)
    //        });
    //    });
});


4. Challenge: React to presses of the arrow keys by smoothly moving the switcher box 20 pixels in the corresponding direction. The key codes for the arrow keys are: 37 (left), 38 (up), 39 (right), and 40 (down).

jQuery(document).ready(function ($) {
    var $switcher = $('#switcher');
    $switcher.css({
        position: 'relative'
    })
    $(document).keyup(function (event) {
        if (event.keyCode == 37) {  // 37 is key code for left arrow key       
            $switcher.animate({
                left: '+=-20px'
            }, 'slow');
        }
        else if (event.keyCode == 38) {  // 38 is key code for up arrow key       
            $switcher.animate({
                top: '+=-20px'
            }, 'slow');
        }
        else if (event.keyCode == 39) {  // 39 is key code for right arrow key       
            $switcher.animate({
                right: '+=-20px'
            }, 'slow');
        }
        else if (event.keyCode == 40) {  // 40 is key code for down arrow key       
            $switcher.animate({
                bottom: '+=-20px'
            }, 'slow');
        }
    });
});


This is a sample screenshot:


Free Lessons for Chruch Pianists:
Free lessons, tips and downloads for church pianists

DVD Courses (Reharmonization, Play by Ear!, Arranging, Accompanying, Theory for Church Pianists, etc.):
Over 30 hours of DVD instruction for church pianists


Visit Vitabase for Quality Health Supplements


Wednesday, March 28, 2012

Solution to Chapter 3 Exercises of Learning jQuery 3rd Edition


My solutions to Learning jQuery 3rd Edition Chapter 4 Exercises:
1. When Charles Dickens is clicked, apply the selected style to it.

$(document).ready(function ($) {
    $('.author').click(function () {
        $(this).addClass('selected');
    });
});


2. When a chapter title (<h3 class="chapter-title">) is double-clicked, toggle the visibility of the chapter text. 
(look also at the comments section for a shorter solution to this problem)
$(document).ready(function ($) {
    var toggleVisibility = function () {
        $(this).toggle(
            function () {
                $(this).nextAll().addClass('hidden');
            },
            function () {
                $(this).nextAll().removeClass('hidden');
            }
        );
    };

    $('.chapter-title').dblclick(toggleVisibility);
});


3. When the user presses the right arrow key, cycle to the next body class. The key code for the right arrow key is 39.

$(document).ready(function ($) {
   
var bodyClass = ["default", "narrow", "large"];
    var numberOfBodyClasses = 3;
    var currentBodyClassNumber = 0;


    // setBodyClass() & toggleSwitcher() ARE FROM THE BOOK'S CODE
    // Allow the style switcher to expand and collapse.
    var toggleSwitcher = function (event) {
        if (!$(event.target).is('button')) {
            $('#switcher button').toggleClass('hidden');
        }
    };
    // The setBodyClass() function changes the page style.
    // The style switcher state is also updated.
    var setBodyClass = function (className) {
        $('body').removeClass().addClass(className);

        $('#switcher button').removeClass('selected');
        $('#switcher-' + className).addClass('selected');

        $('#switcher').unbind('click', toggleSwitcher);

        if (className == 'default') {
            $('#switcher').bind('click', toggleSwitcher);
        }
    };

    $(document).keyup(function (event) {
        currentBodyClassNumber = (currentBodyClassNumber + 1) % numberOfBodyClasses;
        if (event.keyCode == 39) // 39 is key code for right arrow key
        {
            setBodyClass(bodyClass[currentBodyClassNumber]);
        }
    });

});


4. Challenge: Use the console.log() function to log the coordinates of the mouse as it moves across any  paragraph. (Note: console.log() displays its results via the Firebug extension for Firefox, Safari's Web Inspector, or the Developer Tools in Chrome).

$(document).ready(function ($) {
    $('p').mousemove(function (event) {
        console.log("Mouse location: (" + event.pageX + ", " + event.pageY + ")");
    });

 });


5. Challenge: Use .mousedown() and .mouseup() to track mouse events anywhere on the page. If the mouse button is released above where it was pressed, then add the hidden class to all paragraphs. If it is released below where it was pressed, then remove the hidden class from all paragraphs.

$(document).ready(function ($) {
    var mouseDownYLocation = 0;

    $(document).mousedown(function (event) {
        mouseDownYLocation = event.pageY;
    });
   
    $(document).mouseup(function (event) {
        if (event.pageY < mouseDownYLocation) //if mouse button is released above where it was pressed
        {
            $('p').addClass('hidden');
        }
       else if(event.pageY > mouseDownYLocation) //if mouse button is released below where it was pressed
        {
            $('p').removeClass('hidden');
        }
    });
});


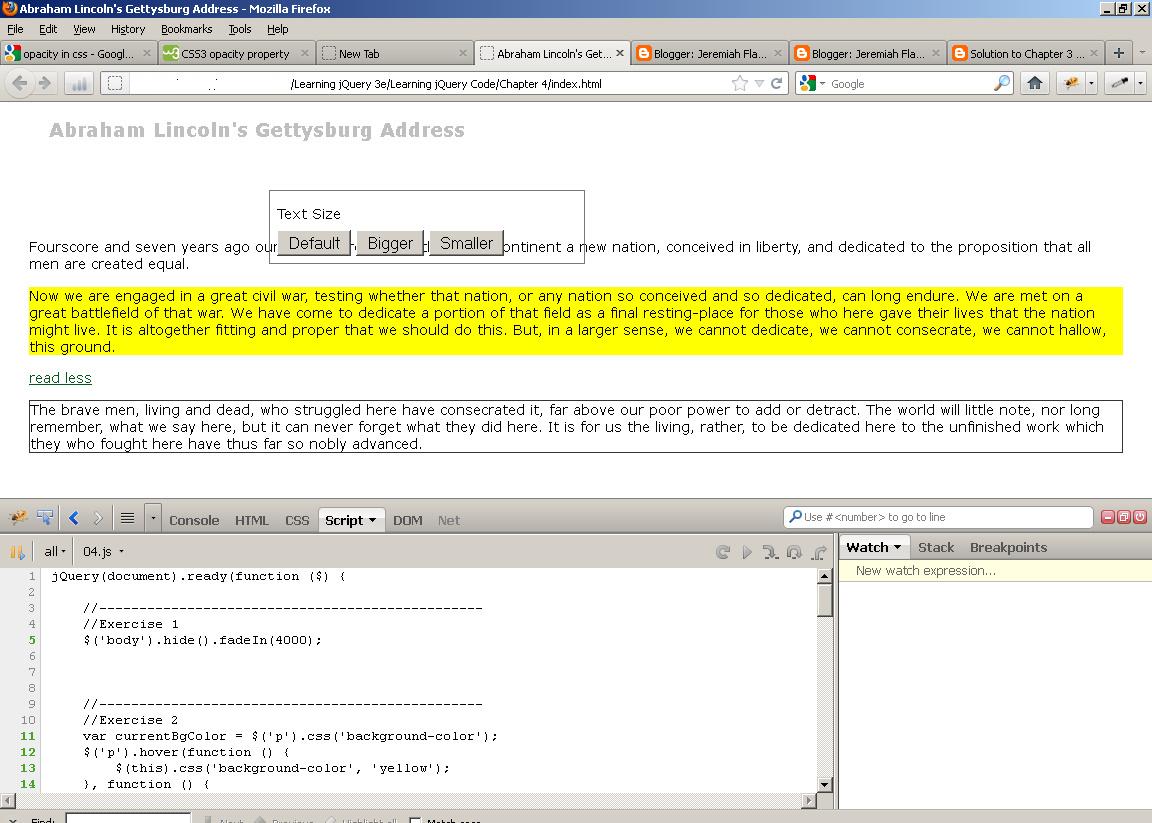
This is how the page looks after I clicked Charles Dickens (Exer 1), double-clicked Preface (Exer 2), pressed right arrow key once (Exer 3), and moved the mouse across paragraphs (Exer 4).


Free Lessons for Chruch Pianists:
Free lessons, tips and downloads for church pianists

DVD Courses (Reharmonization, Play by Ear!, Arranging, Accompanying, Theory for Church Pianists, etc.):
Over 30 hours of DVD instruction for church pianists


Visit Vitabase for Quality Health Supplements


Tuesday, March 27, 2012

Solution to Chapter 2 Exercises of Learning jQuery 3rd Edition


Exercises:

1. Add a class of special to all of the <li> elements at the second level of the
nested list.

$(document).ready(function () {
    $('li.horizontal').find('li').addClass('special');
});


2. Add a class of year to all of the table cells in the third column of a table.


$(document).ready(function () {
    $('td:nth-child(3)').addClass('year');
});


3. Add the class special to the first table row that has the word Tragedy in it.

$(document).ready(function () {
    $('tr').children(':contains(Tragedy)').first().addClass('special');
});


4. Challenge: Select all of the list items (<li>s) containing a link (<a>). Add the
class afterlink to the sibling list items that follow the ones selected.

$(document).ready(function () {
    $('li:has(a)').nextAll().addClass('afterlink');
});


5. Challenge: Add the class tragedy to the closest ancestor <ul> of any
.pdf link.

$(document).ready(function () {
    $('a[href$=".pdf"]').closest('ul').addClass('tragedy');
});


This is how the webpage looks after applying the above jQuery:


Free Lessons for Chruch Pianists:
Free lessons, tips and downloads for church pianists

DVD Courses (Reharmonization, Play by Ear!, Arranging, Accompanying, Theory for Church Pianists, etc.):
Over 30 hours of DVD instruction for church pianists


Visit Vitabase for Quality Health Supplements