Thursday, November 29, 2012

Simple Student Information System using ASP.NET MVC4 (w/ C#)

I created a practice project where I use my new knowledge on Entity Framework Code First, the Repository and Unit of Work patterns with ASP.NET MVC4 and Unit Testing including mocking with Moq.

I published it on GitHub.
(Not yet finished)(I think I am finished with the thing I wanted to practice on - using the Repository and Unit of Work patterns)

There are functionalities that are not yet implemented in this project:
1. Updating the list of Degrees
2. Updating the list of Subjects
3. Updating the list of Semesters, Periods and Levels
4. Roles and permissions - for now, anybody can register, login and update student records.
(also, Unit Testing is not yet completed)

I have to set aside this project for a while because there are other things I need to study.

If you are interested, you can view/download/fork it from here: https://github.com/jboyflaga/StudInfoSys.AspNetMvc4.git


Wednesday, October 31, 2012

Error in Connecting to a Sitecore Web site through Sitecore Rocks


When I tried to create a new Sitecore Rocks connection to a Sitecore web site with the values specified in the image below, the following error occured:

The Web site does not respond.

It looks like the server address is a local web site. If the web site is running on ASP.NET Development Server, the server may not have been started yet.

Do you want to retry?


You might have already guessed the reason for this error.

But if you are like me who is not yet very experienced with configuring websites and who sometimes forgets what a "host name" is, here is the solution to that problem:
The "host name" here is the same as the "host name" of your website in IIS

Tuesday, October 30, 2012

Object of type 'System.Int32' cannot be converted to type 'System.Web.Security.Cryptography.Purpose'


After installing Visual Studio 2012 and .NET Framework 4.5 an error occurs when logging in in Sitecore (Version 6.4):

Object of type 'System.Int32' cannot be converted to type 'System.Web.Security.Cryptography.Purpose'

To fix this, change this setting in the web.config file from true to false:

<setting name="Login.RememberLastLoggedInUserName" value="false" />


This fix is from the comments section of this blog post: http://kamranicus.com/Blog/Posts/45/sitecore-and-net-framework-45

also: http://truncatedcodr.wordpress.com/2012/06/20/fix-sitecore-and-net-framework-4-5/

Tuesday, October 16, 2012

My First KnockoutJS Excercise

I am currently practicing KnockoutJS

Take a look at it: http://jsfiddle.net/jboyflaga/uhSmM/4/

I've updated my first knockout exercise to make use of control of flow binding: http://jsfiddle.net/jboyflaga/uhSmM/7/


Saturday, September 1, 2012

After Evolution, What's Next


Today, if you do not believe in evolution you are considered unscientific by many intellectuals.

But some intellectuals today are starting to realize that what they observe today does no agree with evolution.

Because humans have the tendency to invent things just to convince themselves that God does not exists - What's next, then, to (macro)evolution?

I think what's next will be this: Intelligent Design where the intelligent designer are extraterrestrials (or aliens from outer space).

The next generation is being brainwashed into this kind of thinking. People are trying to create STORIES (no real evidence) that are very convincing to make themselves and others believe that aliens from other planets exist.


(Dr. Greg Bahnsen presented a very compelling evidence on the existence of the God of the Bible on

The Great Debate: Does God Exist?)


Monday, May 21, 2012

ASP.NET MVC 3 (w/ C#): Student Information System


This is a simple Student Information System I created using ASP.NET MVC 3 and C#.

You can download the zip file here.


Because I'm new to ASP.NET MVC, I will list some interesting things for beginners that I used in this project:
  1. Adding attributes to entity classes generated by Entity Framework
  2. Creating AJAX search form
  3. Using Html.DropDownListFor() helper
  4. Using jQuery UI Datepicker

Saturday, May 19, 2012

Simple Student Information System Using .NET WinForms & DataSet


This is a simple Student Information System I created using the .NET Framework
 - Windows Forms for the GUI and DataSet for data access.
 - .NET language used: VB.NET

You can download this on Google Docs

You don't need to install the database used in this project because the Visual Studio Solution is configured to copy the database in the "Debug" folder and the application is configured to look for the database in the directory where the executable is located.

Username: admin
Password: admin

Happy coding!!!

Tuesday, May 15, 2012

ASP.NET MVC ERROR: Store update, insert, or delete statement affected an unexpected number of rows (0).

Server Error in '/' Application. 

Store update, insert, or delete statement affected an unexpected number of rows (0). Entities may have been modified or deleted since entities were loaded. Refresh ObjectStateManager entries.


Possible Problem:
You placed a ReadOnlyAttribute in you entity key's metadata, which causes its value to become zero

     [DisplayName("Student ID")]
     [ReadOnly(true)]
     public int StudentID { get; set; }


Solution:
Remove the ReadOnlyAttribute

     [DisplayName("Student ID")]
     public int StudentID { get; set; }


For other possible causes for this problem and possible solutions, please refer to this link http://stackoverflow.com/questions/1836173/entity-framework-store-update-insert-or-delete-statement-affected-an-unexpec


Free Lessons for Chruch Pianists:
Free lessons, tips and downloads for church pianists

DVD Courses (Reharmonization, Play by Ear!, Arranging, Accompanying, Theory for Church Pianists, etc.):
Over 30 hours of DVD instruction for church pianists


Visit Vitabase for Quality Health Supplements

Thursday, April 26, 2012

Solution to Chapter 8 Exercises of Learning jQuery 3rd Edition


My solutions to Learning jQuery 3rd Edition Chapter 7 exercises:


Exercises:


Some of the exercises are requires modifications of codes from the book. You can easily locate my modifications by looking for //--------------Added sections


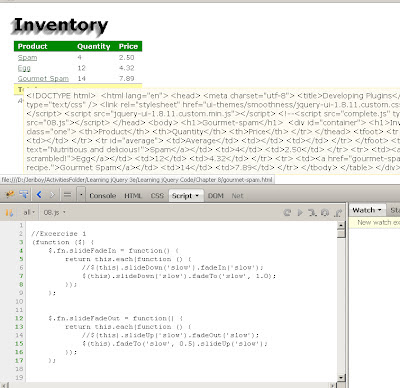
1. Create new plugin methods called .slideFadeIn() and .slideFadeOut(), combining the opacity animations of .fadeIn() and .fadeOut() with the height animations of .slideDown() and .slideUp().

(function ($) {
    $.fn.slideFadeIn = function() {
        return this.each(function () {
            //$(this).slideDown('slow').fadeIn('slow');
            $(this).slideDown('slow').fadeTo('slow', 1.0);
        });
    };
  
    $.fn.slideFadeOut = function() {
        return this.each(function () {
            //$(this).slideUp('slow').fadeOut('slow');
            $(this).fadeTo('slow', 0.5).slideUp('slow');
        });
    };
})(jQuery);

//------Sample code for testing excercise 1
jQuery(document).ready(function ($) {

    //Test for .slideFadeIn & .slideFadeOut
    //Click the <h1>Inventory</h1> to see the effect of these new methods
    $('#container h1').toggle(function() {
        $('#inventory').slideFadeOut();
    }, function () {
        $('#inventory').slideFadeIn();
    });
});


2. Extend the customizability of the .shadow() method so that the z-index of the cloned copies can be specified by the plugin user. Add a new sub-method called isOpen to the tooltip widget. This sub-method should return true if the tooltip is currently displayed and false otherwise.


/******************************************************************************
.shadow()
Create a shadow effect on any element by brute-force copying.
******************************************************************************/
(function ($) {
    $.fn.shadow = function (opts) {
        var options = $.extend({}, $.fn.shadow.defaults, opts);

        return this.each(function () {
            var $originalElement = $(this);
            for (var i = 0; i < options.copies; i++) {
                var offset = options.copyOffset(i);
                $originalElement
          .clone()
          .css({
              position: 'absolute',
              left: $originalElement.offset().left + offset.x,
              top: $originalElement.offset().top + offset.y,
              margin: 0,
              //------------------------------------------------------Added
              zIndex: options.zIndex,
              //-------------------------------------------------------------
              opacity: options.opacity
          })
          .appendTo('body');
            }
        });
    };

    $.fn.shadow.defaults = {
        copies: 5,
        opacity: 0.1,
        copyOffset: function (index) {
            return { x: index, y: index };
        },
        //------------------------------------------------------Added
        zIndex: -1
        //-----------------------------------------------------------
    };
})(jQuery);


/******************************************************************************
.tooltip()
A simple jQuery UI tooltip widget.
******************************************************************************/
(function ($) {
    $.widget('ljq.tooltip', {
        options: {
            offsetX: 10,
            offsetY: 10,
            content: function () {
                return $(this).data('tooltip-text');
            }
        },

        _create: function () {
            //------------------------------------------------------Added
            this.isTooltipOpen = false;
            //-----------------------------------------------------------

            this._tooltipDiv = $('<div></div>')
                .addClass('ljq-tooltip-text ui-widget ui-state-highlight ui-corner-all')
                .hide().appendTo('body');
                    this.element
                .addClass('ljq-tooltip-trigger')
                .bind('mouseenter.ljq-tooltip', $.proxy(this._open, this))
                .bind('mouseleave.ljq-tooltip', $.proxy(this._close, this));
        },

        destroy: function () {
            this._tooltipDiv.remove();
            this.element.removeClass('ljq-tooltip-trigger')
                        .unbind('.ljq-tooltip');
            $.Widget.prototype.destroy.apply(this, arguments);
        },

        open: function () {
            this._open();
        },

        close: function () {
            this._close();
        },

        _open: function () {

            //------------------------------------------------------Added
            this.isTooltipOpen = true;
            //-----------------------------------------------------------
            if (!this.options.disabled) {
                var elementOffset = this.element.offset();
                this._tooltipDiv.css({
                    left: elementOffset.left + this.options.offsetX,
                    top: elementOffset.top + this.element.height() + this.options.offsetY
                }).text(this.options.content.call(this.element[0]));
                this._tooltipDiv.show();
                this._trigger('open');
            }
        },

        _close: function () {
           
            //------------------------------------------------------Added
            this.isTooltipOpen = false;
            //-----------------------------------------------------------

            this._tooltipDiv.hide();
            this._trigger('close');
        },

        //------------------------------------------------------Added
        isOpen: function() {
            return this.isTooltipOpen;
        }
        //-----------------------------------------------------------
    });
})(jQuery);


//------Sample code for testing excercise 2
jQuery(document).ready(function ($) {

    $.fn.shadow.defaults.copies = 10;
    //$.fn.shadow.defaults.zIndex = 2; //if you uncomment this, Clicking <h1>Inventory</h1> will have no effect
    $('h1').shadow({
        copyOffset: function (index) {
            return { x: -index, y: index };
        }
    });   

    //$('a').tooltip();
    $('a').tooltip().hover(function () {
        //alert($(this).tooltip('isOpen').toString());       
        console.log('Is tooltip open? -> ' + $(this).tooltip('isOpen').toString());
    });
});


3. Add code that listens for the tooltipopen event that our widget fires, and logs a message to the console.


jQuery(document).ready(function ($) {
    $('a').bind('tooltipopen', function () {
        console.log('tooltip open event fires');
    });
});


4. Challenge: Provide an alternative content option for the tooltip widget that fetches the content of the page and anchor's href points to via Ajax, and displays that content as the tooltip text.


jQuery(document).ready(function ($) {
    $('a').tooltip({ content: function () {
        var url = $(this).attr('href');
        var result = null;
        $.ajax({
            url: url,
            type: 'get',
            dataType: 'html',
            async: false,
            success: function (data) {
                result = data;
            }
        });

        return result;
    }});
});


5. Challenge: Provide a new effect option for the tooltip widget that, if specified, applies the named jQuery UI effect (such as explode) to the showing and hiding of the tooltip.


/******************************************************************************
.tooltip()
A simple jQuery UI tooltip widget.
******************************************************************************/
(function ($) {
    $.widget('ljq.tooltip', {
        options: {
            offsetX: 10,
            offsetY: 10,
            content: function () {
                return $(this).data('tooltip-text');
            }
        },

        _create: function () {
            //------------------------------------------------------Added
            this.isTooltipOpen = false;
            //-----------------------------------------------------------

            this._tooltipDiv = $('<div></div>')
                .addClass('ljq-tooltip-text ui-widget ui-state-highlight ui-corner-all')
                .hide().appendTo('body');
            this.element
                .addClass('ljq-tooltip-trigger')
                .bind('mouseenter.ljq-tooltip', $.proxy(this._open, this))
                .bind('mouseleave.ljq-tooltip', $.proxy(this._close, this));
        },

        destroy: function () {
            this._tooltipDiv.remove();
            this.element.removeClass('ljq-tooltip-trigger')
                        .unbind('.ljq-tooltip');
            $.Widget.prototype.destroy.apply(this, arguments);
        },

        open: function () {
            this._open();
        },

        close: function () {
            this._close();
        },

        _open: function () {

            //------------------------------------------------------Added
            this.isTooltipOpen = true;
            //-----------------------------------------------------------

            if (!this.options.disabled) {
                var elementOffset = this.element.offset();
                this._tooltipDiv.css({
                    left: elementOffset.left + this.options.offsetX,
                    top: elementOffset.top + this.element.height() + this.options.offsetY
                }).text(this.options.content.call(this.element[0]));
                this._tooltipDiv.show();
                this._trigger('open');

                //------------------------------------------------------Added
                if(this.options.effect) {
                    this._tooltipDiv.effect(this.options.effect, {distance: 10, duration: 80});
                }
                //-----------------------------------------------------------
            }
        },

        _close: function () {

            //------------------------------------------------------Added
            this.isTooltipOpen = false;
            //-----------------------------------------------------------

            this._tooltipDiv.hide();
            this._trigger('close');
        },

        //------------------------------------------------------Added
        isOpen: function () {
            return this.isTooltipOpen;
        }
        //-----------------------------------------------------------
    });
})(jQuery);

//------Sample code for testing excercise 5
jQuery(document).ready(function ($) {
    $('a').tooltip({effect: 'shake'});
});


Free Lessons for Chruch Pianists:
Free lessons, tips and downloads for church pianists

DVD Courses (Reharmonization, Play by Ear!, Arranging, Accompanying, Theory for Church Pianists, etc.):
Over 30 hours of DVD instruction for church pianists


Visit Vitabase for Quality Health Supplements

Wednesday, April 25, 2012

Playing Mood Music Video By Greg Howlett


In this video, Greg Howlett teaches how to play soft piano music when playing reflective songs.


You can download the example used in the video here.

Here's an outline on what you'll learn in this video:

Outline - Playing Mood Music with Greg Howlett

I. General Principles
A. Focus on harmony. You have to know what notes belong to what chord.
B. Spread out the notes you play. Use open voicing
C. Less is More! Play less
1. Simplify the patterns you play.
2. Avoid doubling/octaves.
"Train your ear. It's your best tool."


II. Beginning Techniques (Applications)
A. Open arpeggios (left hand)
B. Play open intervals in both hands (rather than octaves). Play 6ths, 5ths, 7ths, 9ths, 10ths but avoid octaves.
C. Broken chords. Play parts of a chord in different segments of time.
1. It makes you have more control over the sound.
2. It creates movement; it fills up space.
D. Take your time (Rubato, "out of time"). This helps remove tension from the music.

III. Advanced (Harmony) Techniques
A. Add 7ths to your triads. (Major 7ths or minor 7ths).
B. Chord substitutions (reharmonization). [see also Some Reharmonization Ideas from Greg Howlett]
C. Color notes. Notes added to chords in addition to 1, 3, 5, and 7


Free Lessons for Chruch Pianists:
Free lessons, tips and downloads for church pianists

DVD Courses (Reharmonization, Play by Ear!, Arranging, Accompanying, Theory for Church Pianists, etc.):
Over 30 hours of DVD instruction for church pianists


Visit Vitabase for Quality Health Supplements

Sunday, April 22, 2012

Solution to Chapter 7 Exercises of Learning jQuery 3rd Edition

My solutions to Learning jQuery 3rd Edition Chapter 7 exercises: 


1. Increase the cycle transition duration to half a second, and change the animation such that each slide fades out before the next one fades in. Refer to the Cycle documentation to find the appropriate option to enable this.

jQuery(document).ready(function ($) {
    $('#books').cycle({
        timeout: 500,
        speed: 200,
        pause: true,
        //------------------
        fx: 'fade',
        //------------------
        before: function () {
            $('#slider').slider('value', $('#books li').index(this));
        }
    });

});


2. Set the cyclePaused cookie to persist for 30 days.


jQuery(document).ready(function ($) {
    $('<button>Pause</button>').click(function () {
        $('#books').cycle('pause');
        //-----------------------------------------------
        $.cookie('cyclePaused', 'y', { expires: 30 });
        //-----------------------------------------------
        return false;
    }).button({
        icons: { primary: 'ui-icon-pause' }
    }).appendTo('#books-controls');

});


3. Constrain the title box to resize only in ten pixel increments.

jQuery(document).ready(function ($) {
    $('#books .title').resizable({
        handles: 's',
        //--------------------
        distance: 10
        //--------------------
    });

});


4. Make the slider animate smoothly from one position to the next as the slideshow advances.

jQuery(document).ready(function ($) {
    $('<div id="slider"></div>').slider({
        min: 0,
        max: $('#books li').length - 1,
        slide: function (event, ui) {
            $('#books').cycle(ui.value);
        },
        //-------------------
        animate: true
        //-------------------
    }).appendTo('#books-controls');

});


5. Instead of letting the slideshow loop forever, cause it to stop after the last slide is shown. Disable the buttons and slider when this happens.


jQuery(document).ready(function ($) {
    $('#books').cycle({
        timeout: 500,
        speed: 200,
        pause: true,
        fx: 'fade',
        //---------------
        nowrap: true,
        //---------------
        before: function () {
            $('#slider').slider('value', $('#books li').index(this));
        }
    });

});


6. Create a new jQuery UI theme that has a light blue widget background and dark blue text, and apply the theme to our sample document. 


a. Go to http://jqueryui.com/themeroller/
b. Click on the "Content" tab as shown in the image below:


c. Click on the "Clickable: default state" tab and do the same thing you did in step b.
d. Click "Download theme" button
(Download the zip file and integrate the css and js files contained in the zip file into your site)


Free Lessons for Chruch Pianists:
Free lessons, tips and downloads for church pianists

DVD Courses (Reharmonization, Play by Ear!, Arranging, Accompanying, Theory for Church Pianists, etc.):
Over 30 hours of DVD instruction for church pianists


Visit Vitabase for Quality Health Supplements


Friday, April 20, 2012

Solution to Chapter 6 Exercises of Learning jQuery 3rd Edition


My solutions to Learning jQuery 3rd Edition Chapter 6 exercises:


1. When the page loads, pull the body content of exercises-content.html into the content area of the page.

jQuery(document).ready(function ($) {
    $('#dictionary').load('exercises-content.html');
});


2. Rather than displaying that whole document at once, create "tooltips" for the letters in the left column by loading just the appropriate letter's content from exercises-content.html when the user's mouse is over the letter.

jQuery(document).ready(function ($) {
    $('div[id^="letter-"] a').hover(function () {
        var id = $(this).closest('div').attr('id');
        //alert(id);
        $('#dictionary').load('exercises-content.html #' + id);
    }, function () {
        $('#dictionary').html('');
    });

});


3. Add error handling for this page load, displaying the error message in the content area. Test this error handling code by changing the script to request does-not-exist.html rather than exercises-content.html.

jQuery(document).ready(function ($) {
    $.get('does-not-exist.html', function (data) {
        $('#dictionary').append(data);
    }).error(function (jqxhr) {
        $('#dictionary').html('<h2>an error occured: ' + jqxhr.status + '</h2>').append(jqxhr.responsetext);
    });

});


4. Challenge: When the page loads, send a JSONP request to Twitter and retrieve a user's last five messages. Insert the messages into the content area of the page. The URL to retrieve the last five messages of user kswedberg is: http://twitter.com/statuses/user_timeline/kswedberg.json?count=5.

jQuery(document).ready(function ($) {
    // with help from http://wpcanyon.com/tipsandtricks/2-different-ways-for-getting-twitter-status-php-and-jquery/
    var url = 'http://twitter.com/statuses/user_timeline/jeremiahflaga.json';
   
    $.getJSON(url + '?count=5&callback=?', function (data) {
        var html = '';
        $.each(data, function (entryIndex, entry) {
            html += '<h3 class="entry">' + entry.text + '</h3>';
        });
        $('#dictionary').html(html);
    });

});


Free Lessons for Chruch Pianists:
Free lessons, tips and downloads for church pianists

DVD Courses (Reharmonization, Play by Ear!, Arranging, Accompanying, Theory for Church Pianists, etc.):
Over 30 hours of DVD instruction for church pianists


Visit Vitabase for Quality Health Supplements


Sunday, April 15, 2012

Solution to Chapter 5 Exercises of Learning jQuery 3rd Edition


Free Lessons for Chruch Pianists:
Free lessons, tips and downloads for church pianists

DVD Courses (Reharmonization, Play by Ear!, Arranging, Accompanying, Theory for Church Pianists, etc.):
Over 30 hours of DVD instruction for church pianists


My solutions to Learning jQuery 3rd Edition Chapter 5 Exercises:

1. Alter the code that introduces the back to top links so that the links only appear beginning after the fourth paragraph.

jQuery(document).ready(function ($) { 
    $('<a href="#top">back to top</a>').insertAfter('div.chapter p:gt(2)');
});


2. When a back to top link is clicked, add a new paragraph after the link, containing the message You were here. Ensure that the link still works.

jQuery(document).ready(function ($) { 
    $('a').click(function () {
        $('p:contains("You were here.")').remove();
        $(this).after('<p style=\"color: blue\">You were here.</p>');
    });
});


3. When the author's name is clicked, turn it bold (by adding a tag, rather than manipulating classes or CSS attributes).

jQuery(document).ready(function ($) { 
        $('#f-author').click(function () {
            $(this).wrapAll('<b></b>');
        });
});


4. Challenge: On a subsequent click of the bolded author's name, remove the <b> element that was added (thereby toggling between bold and normal text).

jQuery(document).ready(function ($) { 
    $('#f-author').toggle(
        function () {
            $(this).wrapAll('<b></b>');
        },
        function () {
            $(this).unwrap()
        }
    );
});


5. Challenge: Add a class of inhabitants to each of the chapter's paragraphs, without calling .addClass(). Make sure to preserve any existing classes.

jQuery(document).ready(function ($) { 
    var $chapter_p = $('.chapter p');
    var chapter_p_class = $chapter_p.attr('class')
    $chapter_p.attr({ class: chapter_p_class + ' inhabitants' });
});


Friday, April 6, 2012

Customized Twitter Profile Widget


I'm currently training as a web developer.

One of the first tasks the trainees were given is to customize the twitter widget.We were told to replicate the twitter widget that is already present in a particular webpage.

Because this is the first time I am able to do something like this, I'm going to post a sample of my work here.


<html>
<head>

    <title>Twitter Widget BY jBOY</title>

    <style type="text/css">
       
        .twitter-widget-container
        {
            position: relative;
            margin: 40px;
        }
       
        #twtr-widget-1 .twtr-doc .twtr-hd h4      
        {
            color: White !important;
            font-family: Arial,Helvetica,Sans-Serif;
            font-size: 20px !important;
            text-transform: uppercase;
        }
        #twtr-widget-1 .twtr-doc .twtr-hd h3
        {
            color: White !important;
            font-family: Arial,Helvetica,Sans-Serif;
            font-size: 20px !important;
            margin: 0 10px !important;
            text-transform: uppercase; 
        }
       
        .twtr-widget .twtr-tweet
        {
            border-bottom: 1px solid #808080;
            margin: 9px 15px 0;
            padding-bottom: 10px;
        }
        .twtr-doc
        {
            background: none repeat scroll 0 0 #E5E5E5;
        }
        .twtr-doc .twtr-hd
        {
            background: none repeat scroll 0 0 #666666;
        }
        .twtr-doc .twtr-hd h3
        {
            float: left;
        }
        .twtr-doc .twtr-bd
        {
            padding: 20px 20px 80px;
        }

        .twtr-doc .twtr-ft
        {
            display: none;
        }      

        .twtr-follow-wrapper a.twtr-follow-btn:link, .twtr-follow-wrapper a.twtr-follow-btn:visited
        {
            background: url("http://www.thenewjournalist.co.uk/wp-content/uploads/2012/01/Follow-us-Twitter-icon.jpg") no-repeat scroll 0 top transparent;
            top: 425px;
            display: block;
            height: 60px;
            left: 20px;
            position: absolute;
            width: 205px;
            z-index: 2;
        }
    </style>

</head>
<body>
    <div id="twitter-widget-container" class="twitter-widget-container">

        <div class="twitter-wrap">
        <script type="text/javascript" src="http://widgets.twimg.com/j/2/widget.js"></script>
        <script type="text/javascript">
            new TWTR.Widget({
                version: 2,
                type: 'search',
                rpp: 10,    //This is how many tweets to show.
                search: 'jeremiahflaga',
                interval: 30000,
                title: 'TAG YOUR TWEETS WITH',
                subject: '#jeremiahflaga',
                height: 356,
                width: 560,
                theme: {
                    shell: {
                        background: 'none',
                        color: '#000'
                    },
                    tweets: {
                        background: '#fff',
                        color: '#5b5b5b',
                        links: '#ca181f'
                    }
                },
                features: {
                    scrollbar: true,
                    loop: false,
                    live: true,
                    hashtags: true,
                    timestamp: true,
                    avatars: true,
                    toptweets: true,
                    behavior: 'all',
                    toptweets: true,
                    following: false
                }
            }).render().start();
        </script>
   
        </div>

        <div class="twtr-follow-wrapper">
            <a class="twtr-follow-btn" target="_blank" href="http://www.twitter.com/jeremiahflaga"></a>
        </div>
    </div>

</body>
</html>


The CSS that I used here are not all mine. Most of them were taken from the webpage of which we were told to replicate the twitter widget. I just added some and modified some.


Free Lessons for Chruch Pianists:
Free lessons, tips and downloads for church pianists

DVD Courses (Reharmonization, Play by Ear!, Arranging, Accompanying, Theory for Church Pianists, etc.):
Over 30 hours of DVD instruction for church pianists


Visit Vitabase for Quality Health Supplements


ASP.NET MVC 3 Simple Project: Student Information System


This is a simple Student Information System created using ASP.NET MVC and VB.NET as the language for code behind files.

You can download the source code from Google Docs or from Planet Source Code.

Enjoy!

Friday, March 30, 2012

ASP.NET: Personality Temperament Test Project


This project is created using ASP.NET with C# as the language used in code-behind files.

If you are interested with the source code, you can download it from Google docs or from Planet Source Code.

You can use the following as your initial username and password:
Username: user1
Password: user1!234


Solution to Chapter 4 Exercises of Learning jQuery 3rd Edition


My solutions to Learning jQuery 3rd Edition Chapter 4 Exercises:

1. Alter the stylesheet to hide the contents of the page initially. When the page is loaded, fade in the contents slowly.

jQuery(document).ready(function ($) {
    $('body').hide().fadeIn(4000);
});


2. Give each paragraph a yellow background only when the mouse is over it.

jQuery(document).ready(function ($) {
    var currentBgColor = $('p').css('background-color');
    $('p').hover(function () {
        $(this).css('background-color', 'yellow');
    }, function () {
        $(this).css('background-color', currentBgColor);
    });
});


3. Make a click of the title (<h2>) simultaneously make it fade to 25% opacity and get a left margin of 20px, then when this is complete, fade the speech text to 50% opacity.

jQuery(document).ready(function ($) {
    $('h2').click(function () {
        $(this).fadeTo('slow', .25).animate({
            marginLeft: '20px'
        }, {
            duration: 'slow',
            queue: false
        }, function () {            // completion callback
            $('.speech').fadeTo('slow', .5)
        });
    });

    //OR
    //    $('h2').click(function () {
    //        $(this).animate({
    //            opacity: 0.25,
    //            marginLeft: '20px'
    //        }, 'slow', function () {
    //            $('.speech').fadeTo('slow', .5)
    //        });
    //    });
});


4. Challenge: React to presses of the arrow keys by smoothly moving the switcher box 20 pixels in the corresponding direction. The key codes for the arrow keys are: 37 (left), 38 (up), 39 (right), and 40 (down).

jQuery(document).ready(function ($) {
    var $switcher = $('#switcher');
    $switcher.css({
        position: 'relative'
    })
    $(document).keyup(function (event) {
        if (event.keyCode == 37) {  // 37 is key code for left arrow key       
            $switcher.animate({
                left: '+=-20px'
            }, 'slow');
        }
        else if (event.keyCode == 38) {  // 38 is key code for up arrow key       
            $switcher.animate({
                top: '+=-20px'
            }, 'slow');
        }
        else if (event.keyCode == 39) {  // 39 is key code for right arrow key       
            $switcher.animate({
                right: '+=-20px'
            }, 'slow');
        }
        else if (event.keyCode == 40) {  // 40 is key code for down arrow key       
            $switcher.animate({
                bottom: '+=-20px'
            }, 'slow');
        }
    });
});


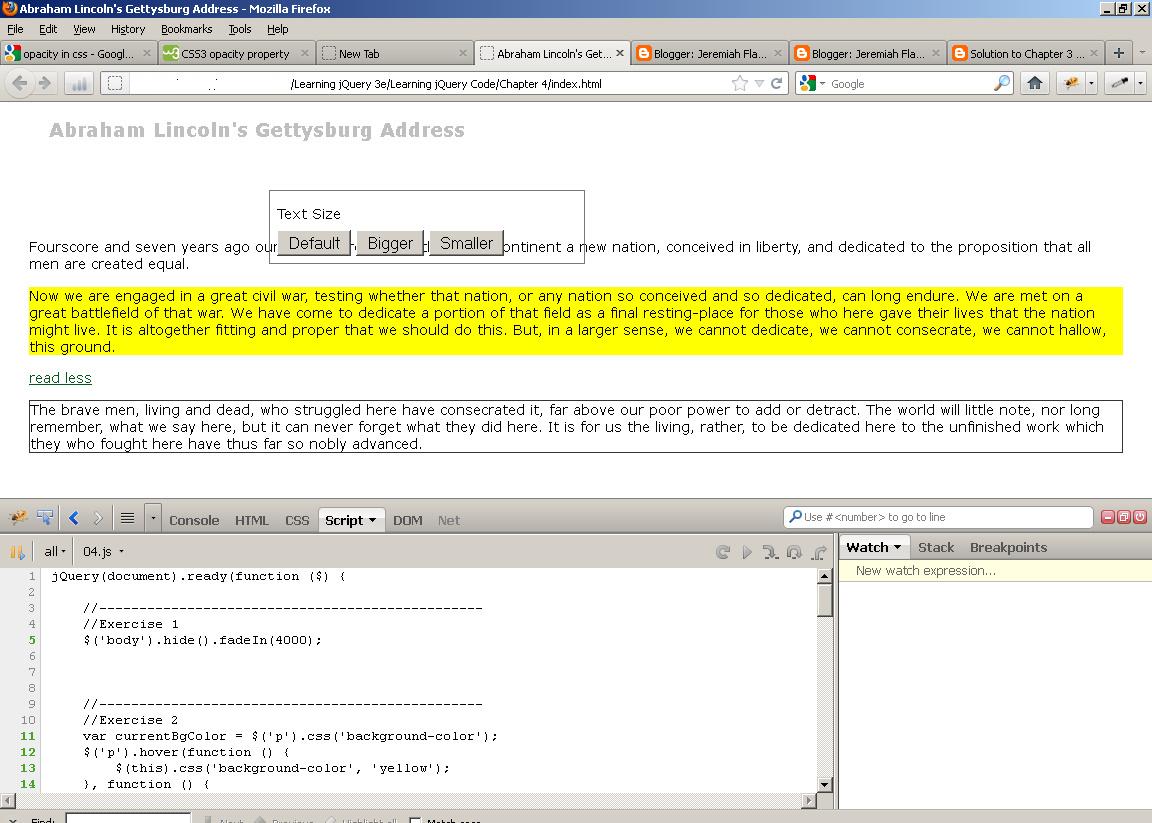
This is a sample screenshot:


Free Lessons for Chruch Pianists:
Free lessons, tips and downloads for church pianists

DVD Courses (Reharmonization, Play by Ear!, Arranging, Accompanying, Theory for Church Pianists, etc.):
Over 30 hours of DVD instruction for church pianists


Visit Vitabase for Quality Health Supplements